I
like to do all my die cutting, shaping and coloring first.
Die cut 2 of your Festive Holiday Decorative
dies using white cardstock. TIP: when
stamping with Pigment ink you will have
to let it dry or set with a heat gun
before die cutting and
coloring to avoid smudging. Using your Large Sweet
Peony Stamp
Set, Small Peony Stamp Set, stamp your flowers using the
Distress
Oxide Worn Lipstick ink. Using the Small Sweet Peony
Stamp set stamp the leaves
using the Color Box Olive Pastel Ink.
Using your Peony Bud and Blossom stamp
set, stamp your buds
using a mixture of the Olive Pastel on the leaves and
the Worn Lipstick on the bud. When your stamped images have dried, use
your
stack and store daubers to color your flowers, I have
colored the main flower
using a mixture of Pearlescent Coral
and Crimson Copper,the smaller outer
flowers I used the
Pearlescent Coral.
The outer flowers I have used wired stamens
1 each in the outer flowers and 1 each in the small flowers in
the top corner see tip below for
curling your stamen wires).
Color your
leaves with Memento Pistachio ink and highlight
edges with Distress Ink
Forest Moss. Once dried die cut with coordinating dies. Using your mini mister lightly spray your
flowers, shape using the 3D Floral Basics Shaping Mold. Shape
your peony bud
using your Deluxe Flower Shaping Kit.
Cut your card base using the white
linen cardstock 12” x 6 1/8”.
Fold your card in half, I like to run a bone
folder over the
spine of the card to give it a clean finish. Trim the
selected cardstock from the Sweet Peony Collection, trim this down to 4
mats
of 5 7/8” x 5 7/8”. I like to use a
full sheet of
cardstock and have matching inserts and a rear mat. Lay your
ribbon around you card base and leave equal amounts exposed
to the right side
to tie your bow. Hold in place with a little
tape and adhere your front mat
in place, this will hold you
ribbon in place, repeat with the rear mat
remembering to keep
the card closed to avoid the ribbon bunching. Adhere your
insert mats.
TIP: I like to use the metal stamen
wire and curl them for added effect. I have done this on the outer flowers
and the smaller
flowers. I adhere my flower well in place and then using a
skewer
or a pen or a stylus handle (depending on the size of the curl required)
I curl the wire around and skewer and slide of to give
this beautiful curled
wired effect. You can do this before
you
adhere your flower or when it is secured very well in place.
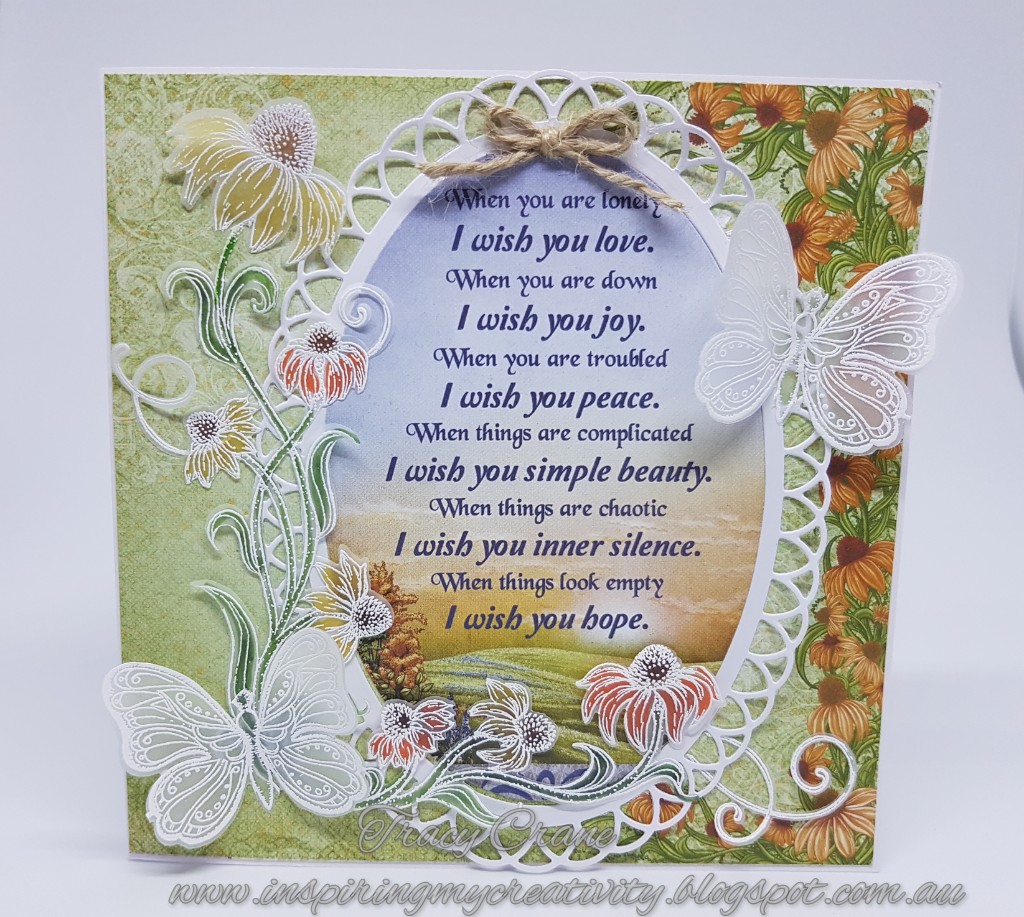
Now you have all your elements done,
you can complete your card. Adhere the flowers and decorative die cuts as pictured.
Using designer dries clear adhesive adhere the “Especially for you” sentiment,
a little glue on the left and right sides, so you canhold the left in place
and when secure push the sentiment up to
have a raised effect for your
heading and hold in place until dry, and you can loop the tail at the bottom
of the blossom stamp through
your sentiment. Decorate with Stickles as
desired. I like to
highlight the leaves and the Baby’s Breath. Tie your bow
to
complete the card.
Happy Crafting
Tracy C x x
|


